10 Best 35 Mm Slide Scanner For Mac 2025 in the United States
Winner
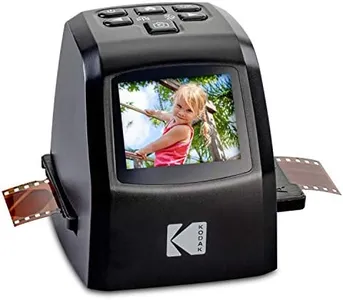
KODAK Slide N SCAN Film and Slide Scanner with Large 5” LCD Screen, Convert Color & B&W Negatives & Slides 35mm, 126, 110 Film Negatives & Slides to High Resolution 22MP JPEG Digital Photos
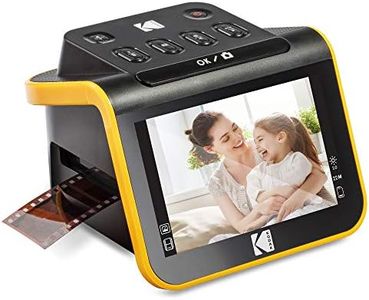
The KODAK SLIDE N SCAN Film and Slide Scanner offers a user-friendly solution for digitizing your old photo memories. Equipped with a high resolution of 22 megapixels, this scanner ensures that your 35mm, 126, and 110 film negatives and slides are converted into high-quality digital photos. The large 5-inch LCD screen with gallery mode is a notable feature, allowing you to preview and edit photos directly on the device, which is convenient for sharing with friends and family or even using it as a digital picture frame.
Most important from
10845 reviews
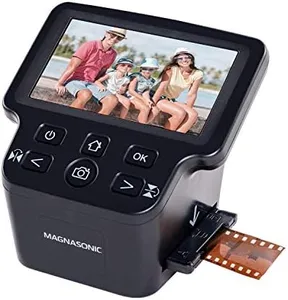
Kodak Slide N Scan Max Digital Film Slide Scanner, Black/Yellow (RODFS70)
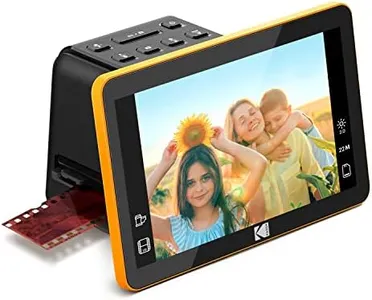
The KODAK 7" Digital Film Scanner is a handy tool for converting your old slides and negatives into digital files. With a resolution of up to 22MP, it ensures your memories are captured in high detail. The 7-inch LCD screen makes it easy to preview and edit images, offering a user-friendly interface. You can directly save your scanned images to an SD or SDHC card, which is very convenient, though these cards are not included with the scanner.
Most important from
1203 reviews
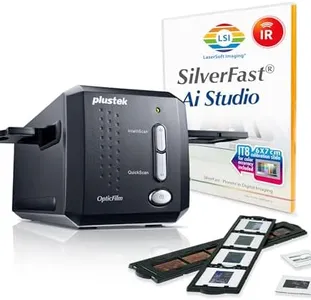
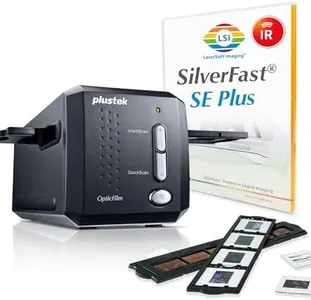
Plustek OpticFilm 8300i Ai Film Scanner - Converts 35mm Film & Slide into Digital, Bundle SilverFast Ai Studio 9 + QuickScan Plus, Include Advanced IT8 Calibration Target (3 Slide)
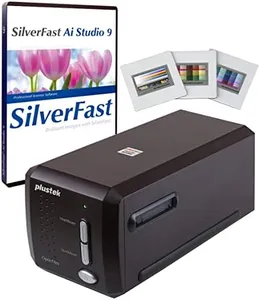
The Plustek OpticFilm 8300i Ai Film Scanner is a robust option for those looking to digitize 35mm films and slides. One of its key strengths is its high resolution of 7200 dpi, which ensures detailed digital reproductions of your film. Additionally, with a color depth of 16 bits, the scanner captures a wide range of colors, making your images vibrant and true to the originals.
Most important from
201 reviews
Top 10 Best 35 Mm Slide Scanner For Mac 2025 in the United States
Winner
9.8 score
KODAK Slide N SCAN Film and Slide Scanner with Large 5” LCD Screen, Convert Color & B&W Negatives & Slides 35mm, 126, 110 Film Negatives & Slides to High Resolution 22MP JPEG Digital Photos


KODAK Slide N SCAN Film and Slide Scanner with Large 5” LCD Screen, Convert Color & B&W Negatives & Slides 35mm, 126, 110 Film Negatives & Slides to High Resolution 22MP JPEG Digital Photos
Chosen by 1158 this week
Kodak Slide N Scan Max Digital Film Slide Scanner, Black/Yellow (RODFS70)


Kodak Slide N Scan Max Digital Film Slide Scanner, Black/Yellow (RODFS70)
Plustek OpticFilm 8300i Ai Film Scanner - Converts 35mm Film & Slide into Digital, Bundle SilverFast Ai Studio 9 + QuickScan Plus, Include Advanced IT8 Calibration Target (3 Slide)


Plustek OpticFilm 8300i Ai Film Scanner - Converts 35mm Film & Slide into Digital, Bundle SilverFast Ai Studio 9 + QuickScan Plus, Include Advanced IT8 Calibration Target (3 Slide)
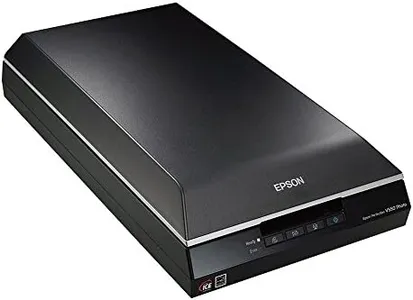
Epson Perfection V600 Color Photo, Image, Film, Negative & Document Scanner
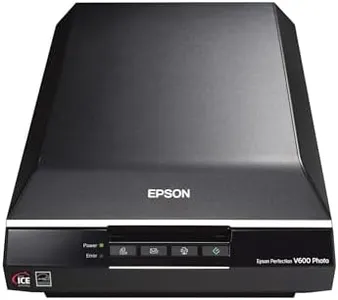


Epson Perfection V600 Color Photo, Image, Film, Negative & Document Scanner


Related Products
Up to 15% off


Epson Perfection V550 Color Photo, Image, Film, Negative & Document Scanner with 6400 DPI Optical Resolution


Epson Perfection V550 Color Photo, Image, Film, Negative & Document Scanner with 6400 DPI Optical Resolution


Our technology thoroughly searches through the online shopping world, reviewing hundreds of sites. We then process and analyze this information, updating in real-time to bring you the latest top-rated products. This way, you always get the best and most current options available.